Table of Contents
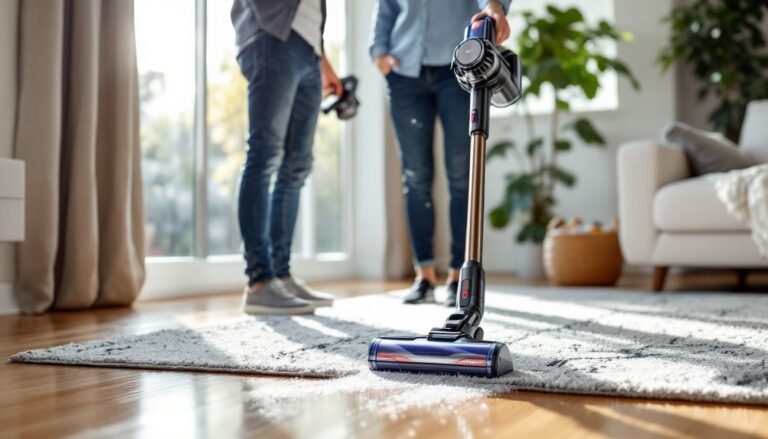
ToggleA Hoover carpet cleaner can transform grimy, stained carpets back into something you’d actually be proud to walk on barefoot. Whether you’re dealing with pet accidents, ground-in dirt, or just general wear and tear, these machines handle the heavy lifting without requiring professional-grade equipment or a contractor’s budget. The key to getting real results, not just pushing dirty water around, is understanding how your machine works and using the right technique from the start. This guide walks through every step, from assembly to cleanup, so you know exactly what you’re doing and can tackle tough stains with confidence.
Key Takeaways
- Learning how to use a Hoover carpet cleaner properly starts with understanding its key components—the clean-water tank, dirty-water tank, brush roll, and recovery system—before you begin any cleaning project.
- Pre-cleaning preparation is essential: vacuum thoroughly, pre-treat stains on hidden areas, and clear the room of obstacles to achieve the best results with your Hoover carpet cleaner.
- Use hot water with properly diluted cleaning solution, fill to the indicated line, and master the push-pull technique (squeeze trigger while pushing forward, release while pulling back) for effective extraction and faster drying.
- Work from the farthest corner toward the door, move slowly at about one step per second, and overlap each pass to ensure complete coverage and avoid leaving moisture behind.
- Empty the dirty-water tank regularly when it appears brown or murky, and perform post-cleaning maintenance by rinsing the brush roll, filter, and tanks to keep your machine functioning optimally.
- Allow carpets to air-dry completely for 4-8 hours before walking on them heavily, and store your machine in a dry location with empty tanks to prevent mold and ensure long-term performance.
Understanding Your Hoover Carpet Cleaner Setup
Before you plug in and start spraying, take 10 minutes to familiarize yourself with the machine’s layout. Most Hoover carpet cleaners follow a similar design: a large dirty-water tank, a clean-water tank, a heating element (on some models), and a recovery system that sucks up soiled water.
Key Parts And Components
The clean-water tank holds your water and cleaning solution mixture. Most residential Hoover models have a capacity between 0.75 to 1.5 gallons for the fresh-water reservoir. The dirty-water tank collects what the machine vacuums up during cleaning: capacity typically ranges from 1 to 2 gallons depending on the model.
The brush roll (or scrubbing brush) is the spinning component that agitates and lifts dirt and stains. Check that it’s not tangled with hair or fibers before starting, this is a common cause of poor performance. The recovery hose and suction motor do the actual extraction: they’re what prevent your carpet from staying soaking wet.
The trigger handle controls when cleaning solution is dispensed as you push the machine forward. Most Hoover models also include a crevice tool and upholstery attachment for stairs, furniture, and tight corners. Don’t overlook these extras: they extend the usefulness of your investment. Check your specific model’s manual (usually available as a PDF on Hoover’s website) because attachment configurations vary.
Pre-Cleaning Preparation: Setting Yourself Up For Success
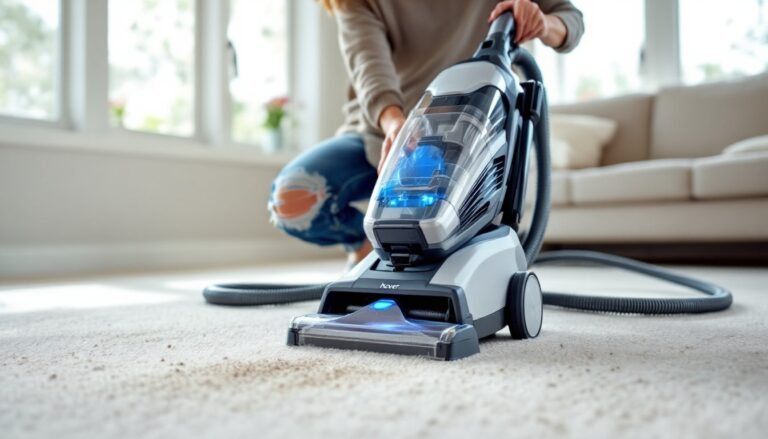
The difference between an okay cleaning result and a great one often comes down to prep work. Start by vacuuming your entire carpet thoroughly with a standard vacuum, don’t skip this step. Loose dirt, crumbs, and pet hair clog the Hoover’s brushes and dirty-water tank faster than you’d think, and you won’t get suction power from a full recovery tank.
Next, identify and pre-treat problem stains. For fresh spills, blot (don’t rub) with a clean cloth to remove excess moisture. For set-in stains, test your chosen pre-treatment cleaner on an inconspicuous area first, a closet corner or the edge under furniture. Wait 24 hours if possible to confirm it won’t bleach or damage the carpet fibers. Common pre-treatments include home organization and cleaning strategies from Real Simple, which cover quick fixes before running your Hoover.
Set the machine in an accessible location near an electrical outlet and ensure you have a water source nearby, either a sink or a bucket for filling. Clear the room of small objects, cords, and furniture legs that might trip you up. If you’re cleaning a large area, you may need to work in sections, so plan where you’ll empty the dirty-water tank partway through.
For best results, close windows and doors to minimize dust and ensure good air circulation afterward. Carpet typically takes 4 to 8 hours to dry completely, depending on humidity, carpet pile, and how much moisture you leave behind.
Filling And Operating Your Machine
Water And Solution Ratios
Fill the clean-water tank with hot water, not boiling, but as hot as your tap will produce. Hot water helps dissolve oils and soils better than cold, and it also aids faster evaporation during drying. Most Hoover carpet cleaners recommend filling to the indicated “fill line,” not above it, to avoid overflow during operation.
Add your cleaning solution according to the bottle’s dilution ratio. Hoover-branded solutions and many generic carpet cleaning solutions suggest a ratio like 1 part solution to 2 parts water, but always check your specific product, overconcentrating makes the carpet sticky and attracts more dirt. Underconcentrating wastes time and won’t lift heavy soils effectively.
If you prefer, plain hot water alone will remove loose dirt, but a proper cleaning solution makes a significant difference for stains and odors. Attach the clean-water tank securely to the machine: you’ll hear or feel a click when it’s locked in place. Never skip this, a loose tank can leak onto your floor and create a safety hazard.
Plug the machine into a grounded outlet and flip the power switch. Most models have a heating element that takes 30 seconds to a few minutes to warm the water. You’ll see an indicator light (or hear a beep) when it’s ready. Some homeowners prefer professional carpet cleaner reviews and guidance to understand the right water temperature and solution strength for their specific carpet type, especially for delicate fabrics.
Cleaning Technique And Best Practices
Start in the farthest corner of the room and work backward toward the door. This way, you’re never standing on the area you just cleaned, and you won’t drip dirty water across your path.
Hold the machine upright and squeeze the trigger as you gently push the cleaner forward: this dispenses the cleaning solution into the carpet. Release the trigger as you pull the machine back, and the suction motor extracts the soiled water. This push-pull motion is crucial: you’re not just spraying and hoping, you’re actively extracting moisture.
Move slowly, about one step per second, to give the brush roll and extraction enough time to work. Rush through, and you’ll leave moisture behind. Overlap each pass slightly, like mowing a lawn, so no strips are missed. For high-traffic areas and stains, make extra passes, there’s no harm in going over the same spot three or four times if it looks dirty.
If your Hoover has an upholstery attachment, switch to it for stairs, furniture, or spot-treating. Use the crevice tool for baseboards and tight edges. These tools use the same cleaning and extraction system but concentrate the flow for precision work.
Watch the dirty-water tank. Once it looks noticeably brown or murky (usually after cleaning 200-300 square feet, depending on how dirty your carpet is), empty it into a toilet or sink and rinse it out. A full tank drastically reduces suction and can leave carpets overly wet. Don’t drain it outside unless local water regulations permit it, sediment and chemicals are involved.
Maintenance And Post-Cleaning Care
Once you’ve finished cleaning, unplug the machine immediately and let it cool for at least 30 minutes before disassembling. Empty both the dirty-water tank and rinse it thoroughly with clean water: soap and mineral deposits left behind reduce effectiveness over time and can create odors.
Remove and rinse the brush roll. Hair and fibers wrap around it constantly, so take a pair of scissors and carefully trim away any tangles. If the bristles look flattened or worn, the brush roll is nearing replacement, Hoover offers aftermarket rolls for most models at reasonable cost. Leaving a worn brush roll in place wastes your effort because it won’t agitate the carpet properly.
If your model has a strainer or filter, rinse it too. Clogged filters reduce suction and can overheat the motor. Some filters are washable and reusable: others are disposable. Check your manual to know which type you have and how often to replace it.
For the carpet itself, open windows and let it air-dry fully before walking on it heavily or replacing furniture. Wet carpet is a slip hazard, and if it doesn’t dry within 24 hours in humid conditions, mildew can develop underneath. A ceiling fan or floor fan speeds up evaporation. Avoid the temptation to walk barefoot or let pets back on wet carpet for at least 4-6 hours.
Store your Hoover in a dry location, a utility closet, garage, or laundry room works well. Make sure the tanks are completely empty so mold doesn’t develop inside. If you notice any musty smell during your next use, soak the tanks in a dilute vinegar solution (1 part white vinegar to 4 parts water) for an hour and rinse thoroughly. Regular maintenance like this keeps your machine ready to tackle spills and deep cleans for years.