Table of Contents
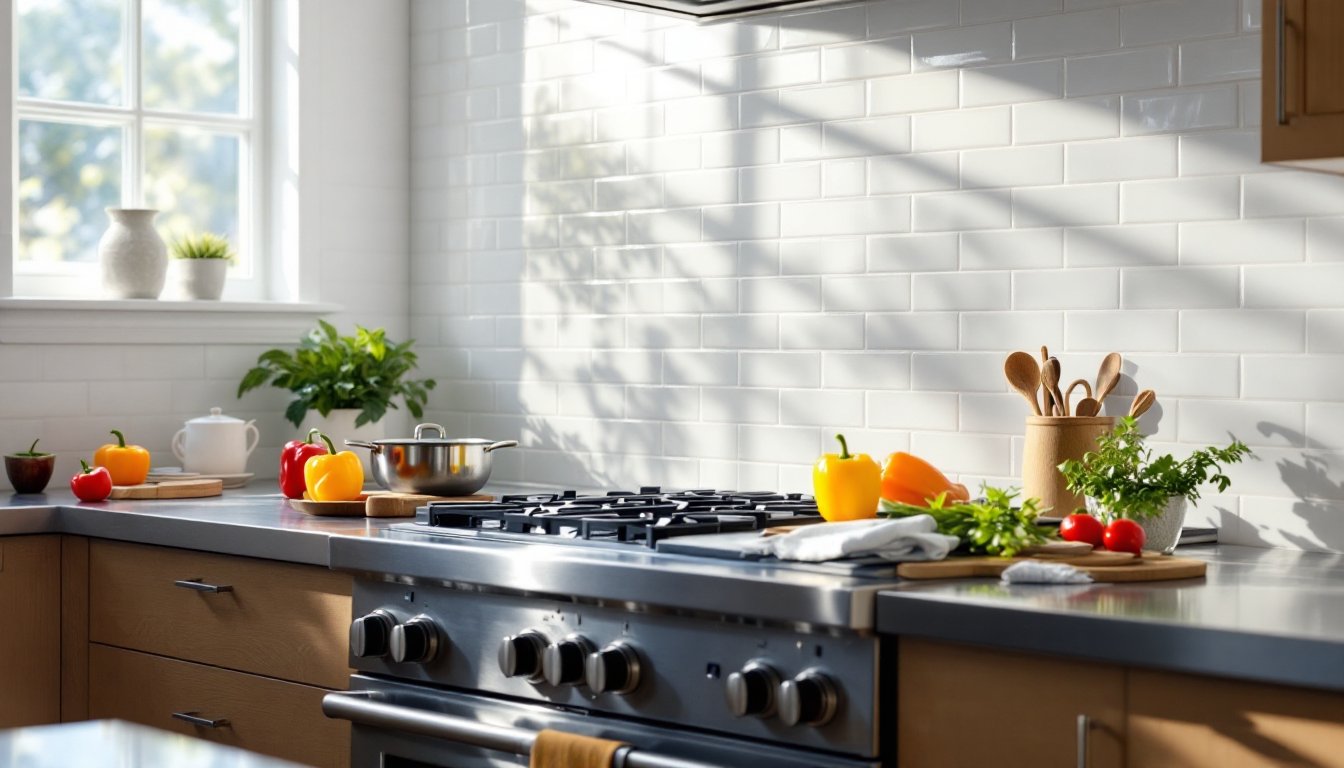
ToggleA white tile backsplash transforms a kitchen from purely functional to genuinely striking, and it’s one of the most forgiving DIY projects a homeowner can tackle. Whether you’re installing a white kitchen tile backsplash above the range, along the prep wall, or wrapping the entire cooking zone, the clean aesthetic pairs with virtually any cabinetry color or countertop material. White tiles reflect light, make the space feel larger, and provide a neutral canvas for hardware, paint, or future updates. This guide covers everything from selecting the right white backsplash tile kitchen style to handling grout, spacing, and maintenance so your installation stays flawless for years.
Key Takeaways
- A white tile backsplash kitchen is a forgiving DIY project that reflects light, hides imperfections, and pairs with virtually any cabinet or countertop style.
- Subway tiles in a running bond pattern remain the most affordable and popular choice, while beveled edges and glossy finishes offer added refinement and easier cleaning.
- Choose white grout for a seamless look, off-white to hide dust, or light gray for subtle definition—and use epoxy or urethane-based grout in high-moisture zones near the range.
- Proper installation requires 24-hour adhesive curing, careful grouting with a sponge to remove excess, and 48-hour grout curing before sealing.
- Daily maintenance with a damp cloth and mild dish soap keeps your white backsplash spotless, while annual grout sealing and proper range hood ventilation ensure long-term durability.
- Heat sources and trapped moisture are the primary threats to backsplash longevity, so ensure exterior venting on your range hood rather than recirculating moisture back into the wall.
Why White Tile Backsplash Works for Modern Kitchens
A white tile kitchen backsplash is far more than a trend, it’s a practical, timeless choice that solves real kitchen problems. White reflects grease splatter and moisture, making it easier to spot and wipe down before stains set. It also bounces light around the space, which is invaluable in kitchens with limited natural light or low ceilings.
From a design standpoint, white creates visual breathing room. If your cabinetry is dark, a white backsplash prevents the space from feeling cave-like. If your cabinets are light or natural wood, white adds continuity and cohesion. It pairs equally well with stainless steel, brass, or matte black hardware, giving you flexibility as trends shift.
Installation is also more forgiving with white tiles. Minor grout imperfections or slight spacing inconsistencies are far less noticeable than they would be with darker tiles. This makes a white tile kitchen backsplash an ideal first-time tiling project for DIY enthusiasts building confidence. The material itself, typically ceramic, porcelain, or glass, is durable, non-porous when properly glazed, and resistant to kitchen staining if sealed correctly.
Popular White Tile Styles and Patterns
Subway Tiles and Beveled Designs
Subway tiles remain the most popular choice for a white backsplash tile kitchen because they’re affordable, widely available, and visually clean. Standard subway tiles measure 3″ × 6″, though variations like 2″ × 4″ and 4″ × 8″ exist. The most common layout is a running bond (offset rows), which breaks up monotony better than a straight stack bond.
Beveled subway tiles add subtle dimension without complicating installation. The angled edge catches light and creates fine shadow lines that make the backsplash feel less flat. They cost slightly more than flat tiles but deliver a more refined look. Beveled edges also hide minor grout inconsistencies because the shadow lines distract the eye from imperfect spacing.
Gloss-finish subway tiles are easier to wipe clean and brighten a space, while matte or satin finishes offer a more contemporary feel. For a white kitchen tile backsplash, glossy finishes (whether ceramic or porcelain) are popular because they’re forgiving of moisture and splatter. Porcelain is denser and less porous than ceramic, making it ideal if your kitchen gets heavy steam or water exposure.
Hexagonal and Mosaic Options
Hexagonal tiles create visual interest without overwhelming a small kitchen. A 2″ hexagon or 1.5″ hex in white can feel modern and sophisticated, especially if arranged in a honeycomb pattern. Installation is slightly trickier because the layout doesn’t follow a straight grid, but the payoff is a unique, designer-looking result that rivals expensive custom backsplashes.
Mosaic sheets, small tiles pre-mounted on mesh backing, speed up installation and ensure consistent spacing. A white mosaic might include 1″ × 1″ tiles, pencil-thin grout lines, or mixed shapes (like a blend of white subway and small square tiles). Mosaic options from retailers on sites with curated design galleries show how varied the aesthetic can be while keeping the white palette intact.
Keep in mind that smaller tiles mean more grout lines, which can trap debris and require more frequent cleaning. If you prefer minimal maintenance, larger tiles (4″ × 8″ or larger) reduce grout exposure while still delivering a clean look.
Choosing the Right Grout and Finish
Grout color and type dramatically affect how your white backsplash looks and ages. Unsanded grout (also called non-shrinking grout) works best for grout lines narrower than 1/8″, while sanded grout is better for lines 1/8″ to 1/2″ wide. Sanded grout resists cracking over time because the sand particles lock together, but it can scratch glossy tiles during application.
For a white tile backsplash, you have three main grout options: white, off-white (ivory or cream), and light gray. White grout matches the tiles for a seamless, monolithic appearance, elegant but unforgiving if grout dust or discoloration shows. Off-white grout hides dust and minor imperfections better while still maintaining a cohesive look. Light gray grout adds subtle definition to each tile without the darkness of charcoal, offering the best of both worlds for many DIYers.
Use epoxy or urethane-based grout (not standard Portland cement) if your backsplash is near the range or in a high-moisture zone. These premium grouts resist staining, don’t require sealing, and stand up to repeated steam and heat cycles far better than traditional grout. They’re pricier and more finicky to apply, you’ve got a narrower working window, but longevity often justifies the cost.
After grouting, seal any grout lines if you’re using standard cement-based grout (again, epoxy and urethane self-seal). A good grout sealer applied 48 hours after grouting prevents grease and water stains from penetrating the porous grout. For best results, reapply sealer yearly.
Installation Steps for DIY Enthusiasts
Prep and safety first: Remove outlet covers and tape over any outlets with painter’s tape and plastic sheeting. Wear safety glasses, work gloves, and a dust mask when cutting or grinding tiles. Ensure the wall surface is clean, dry, and structurally sound, loose drywall or old wallpaper will cause tiles to fail.
Measure and plan your layout before mixing adhesive. Find the center point of your backsplash area and dry-lay tiles to avoid thin slivers at the edges. Mark a guideline using a level and chalk line: this keeps rows straight and saves frustration.
Apply adhesive and set tiles:
- Mix thin-set mortar (not mastic) to a peanut-butter consistency. Thin-set is stronger and more moisture-resistant than mastic, especially for kitchen backsplashes near heat.
- Apply mortar using a notched trowel (typically 1/4″ or 3/8″ depending on tile size) at a 45-degree angle, creating consistent ridges.
- Press each tile firmly into place, twisting slightly to ensure full contact. Use tile spacers (usually 1/8″ to 1/4″) between tiles for uniform grout lines.
- Check with a level every few tiles to catch drift early. Crooked rows are harder to fix later.
- Let thin-set cure for 24 hours before grouting, don’t rush this step.
Grouting and finishing:
- Mix grout to a thick, creamy consistency (like peanut butter). Test by pulling a small amount with a putty knife: it should hold its shape.
- Use a grout float at a 45-degree angle, pressing grout into all joints while removing excess with diagonal sweeps.
- After 15–20 minutes (when grout firms up), use a damp sponge to wipe excess grout from tiles. Rinse the sponge frequently and wring it dry, too much water weakens grout.
- Let grout cure for 48 hours before applying sealer or touching the backsplash.
These steps aren’t complicated, but they require patience and attention. Rushing adhesive curing or grouting cleanup often leads to cracked grout, hollow tiles, or discolored finish.
Maintenance and Long-Term Care Tips
Once your white tile kitchen backsplash is installed and cured, maintenance is straightforward. Daily cleaning is as simple as wiping with a damp cloth and mild dish soap to remove splatters and grease. For stubborn stains, a 1:1 vinegar-and-water solution works on most tiles (test on a hidden area first if you’re using natural stone, which can etch).
Avoid abrasive scouring pads or harsh chemicals like bleach, which can dull glazes or damage grout. A soft-bristle brush and non-acidic all-purpose cleaner are your safest bet for regular maintenance. Every few months, inspect grout lines for hairline cracks or discoloration. Small cracks can be sealed with grout caulk: larger damage warrants professional repair.
If you installed epoxy grout, you’re largely set, no annual sealing needed. If you used standard Portland cement grout, reseal once a year or whenever water stops beading on the grout surface (a sign the sealant has worn). Many homeowners find that a kitchen design resource like The Kitchn offers helpful tips for maintaining tile backsplashes and refreshing kitchen aesthetics over time.
For long-term durability, keep heat sources away from the backsplash if possible. While tile handles moderate heat well, repeated exposure to intense heat near range hoods can cause adhesive to weaken. Ensure your range hood is properly vented to the exterior, not recirculating moisture back into the wall cavity, trapped moisture ruins backsplash longevity far faster than any other single factor.